Editing, Nudging, Rejecting Time Cards for Hourly Employees
Background
Hourly employee time can be recorded in one of two ways:
- Entered by the employer through the Manage Time Cards page
- Entered by the employee through their employee portal account or mobile app
- See “Hourly Employees: Entering My Time Worked.” for more info
If you will be entering time for salary employees, see, “Editing Time Cards for Salary Employees.“
💡 Only time cards that have not yet been paid can be edited. Paid time cards can no longer be edited.
Enter or Edit Time for an Hourly Employee
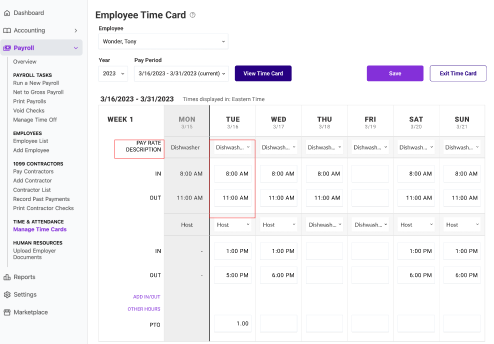
1. Go to Payroll > Time and Attendance Tasks > Manage Time Cards.
- By default, a list of employee time cards will display for the current pay period alphabetically.
- Search for a specific employee in the search field.
- To edit a different pay period, choose the dates from the dropdown menu and click Run Report.
2. Click the employee name to view and make changes to the time card. Each day is shown in columns, and the hours types are shown in rows.
- If the employee is paid weekly, the time card will show a grid for one week.
- If the employee is paid biweekly, the time card will show a grid for two weeks.
- If the employee is paid semi-monthly or monthly, the time card will show all days included in the pay period. Any days of the week outside the pay period will be shown in gray.
3. Roles: If your employee has multiple job roles at your company, choose the job role from the role you want to add/edit from the dropdown.
4. Edit or Enter Time
- Manual entry type– click the date and pop-up time entry window will display. Type the hours and minutes in the following format: 9:00[space]AM. To enter minutes, use the decimal equivalent of minutes in an hour.
- Time punch entry type – If the employee is set to Time punch entry, enter the hour and minute of the time or click “Now” for the current time.
- If editing a time punch that has geotagging, the edited entry location pin will change to yellow. The map will display both the original entry and the employer edit. See Geotagging Employee Time Punches for more information.
5. Click Add-In/Out to add another set of fields for the day. For example, to track paid breaks, just add another set of fields, and enter the paid break start time in the “In,” field and the stop time in the “Out,” field.
Overnight Shift Detection (in beta for select companies)
Sign up here for beta overnight shifts.
If your employee has worked an overnight shift you will see a module confirming an overnight shift like the image below:
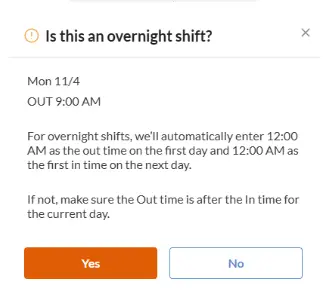
If the entry is correct, click Yes to confirm the overnight shift. The system will automatically split the shift at 12:00 AM, creating 2 time entries:
- Day 1: 6:15 PM – 12:00 AM
- Day 2: 12:00 AM – 9:30 AM
Correcting a Mistake: If you accidentally entered the wrong Out Time (e.g., AM instead of PM), click No when asked if it’s an overnight shift. A validation message will appear, prompting you to correct the Out Time before saving.
6. To add non-worked hours such as vacation or holiday, click “Other Hours.”
- New rows will appear on the time card. Enter the total daily non-worked hours in the corresponding row.
- See Adding Non-Worked Hours to Time Cards for set-up instructions.
7. Add any comments, if needed. There is a space at the bottom of the time card to add employer comments about this pay period.
- All comments will be visible to the employee. Employees can also add their own comments in the employee portal or mobile app.
8. Check the “Approve” box when you’re finished entering time for the pay period. This will also automatically save the time card entries. It is not necessary for the employee to approve their own time card.
9. Click “Save,” if you have made changes but have not yet approved the time card.
[RELATED ARTICLE: Rules on Compressed Workweeks and Overtime]
How to Nudge Employees to Submit Time Cards
💡 You can only nudge employees who have set up their employee portal.
If an employee has not completed or approved their time cards, you can “nudge” them to complete their timecard on the employee timecard or the Manage Time Card Page.
- Go to Payroll > Time and Attendance Tasks > Manage Time Cards.
- Select the employee name if you want to view the individual timecards.
- Select the envelope icon under the “Approval” section to “nudge” employee.
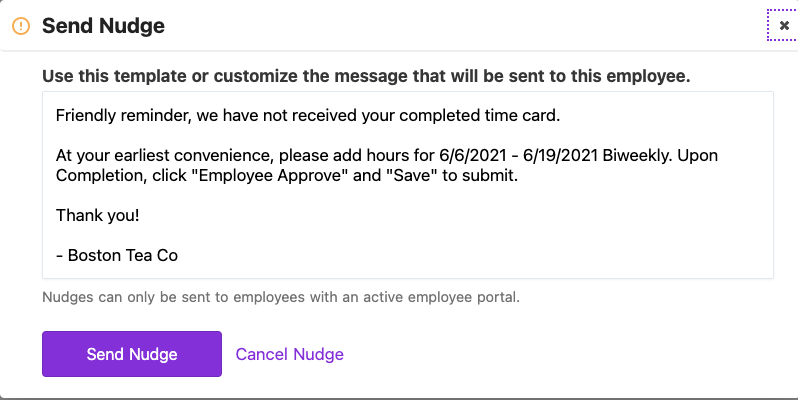
- A popup will appear with the default message.
- Click in the box to customize the message.
- Click “Send Nudge.”
- An email will be sent to the employee.
How to Reject a Time Card for Employee Correction
💡 You can only reject time cards for employees who have set up their employee portal. Otherwise, edit the employee time card, and make a note of changes made for the employee’s record on the time card.
You can reject time cards for employees on the employee time card, or on the Manage Time Card Page.
- Go to Payroll > Time and Attendance Tasks > Manage Time Cards. Select the employee name if you want to view the individual timecard.
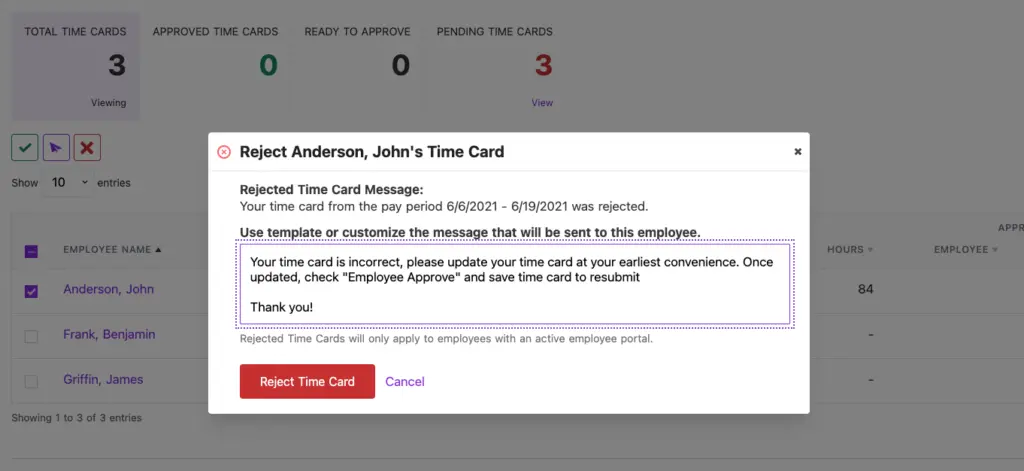
- Select the X to reject the time card under the “Approval” section.
- A pop-up will appear with the default rejection message.
- Click in the box to customize the message for your employee.
- Click the “Reject Time Card” button.
- An email will be sent to the employee.
Your feedback will not receive a reply. If you have a specific issue, please reach out to our support team here.