Editing or Rejecting Time Cards for Salary Employees
In this article:
- How to Enter or Edit Time for Salary Employees
- How to Remind Employees with the Nudge Feature
- How to Reject Time Cards
Using time cards for salaried employees is for record keeping purposes only. Any hours entered in time cards of salary employees will not be used to calculate gross pay.
How to Enter or Edit Time for Salary Employees
💡 You can only edit unpaid time cards. Time cards that have already been used in payroll can no longer be edited.
- Go to Payroll > Time and Attendance Tasks > Manage Time Cards.
- By default, a list of employee time cards will display for the current pay period alphabetically.
- Search for a specific employee in the search bar.
- To edit a different pay period, choose the dates from the dropdown menu and click Run Report.
- Click the employee name to view and make changes to the time card. Each day is shown in columns, and the hour types are shown in rows.
- If the employee is paid weekly, the time card will show a grid for one week.
- If the employee is paid biweekly, the time card will show a grid for two weeks.
- If the employee is paid semi-monthly or monthly, the time card will show all days included in the pay period. Any days of the week outside the pay period will be shown in gray.
- Edit or Enter Time
- Manual entry type– enter total hours by clicking in the appropriate boxes. To enter minutes, use the decimal equivalent of minutes in an hour.
- Time punch entry type – If the employee is set to Time punch entry enter the hour and minute of the time. If editing a time punch that has geotagging, the edited entry location pin will change to yellow. The map will display both the originial entry and the employer edit. See Geotagging Employee Time Punches for more information.
- See our conversion chart for a handy cheat sheet!
- To add non-worked hours such as vacation or holiday, click “Other Hours.”
- New rows will appear on the time card. Enter the total daily non-worked hours in the corresponding row.
- See Adding Non-Worked Hours to Time Cards for set-up instructions.
- Add any comments, if needed for the day or pay period.
- There is a space at the bottom of the time card to add employer comments about this pay period. Note that your comments will be visible to employees.
- Employees using the employee portal can also add their own comments.
- Check the “Approve” box when you’re finished entering time for the pay period. The time card will be automatically saved.
- It is not necessary for the employee to approve or submit their own time card.
- Click “Save.”
Once you approve the time cards, you are ready to Send Timecards to Payroll.
How to Remind Employees with the Nudge Feature
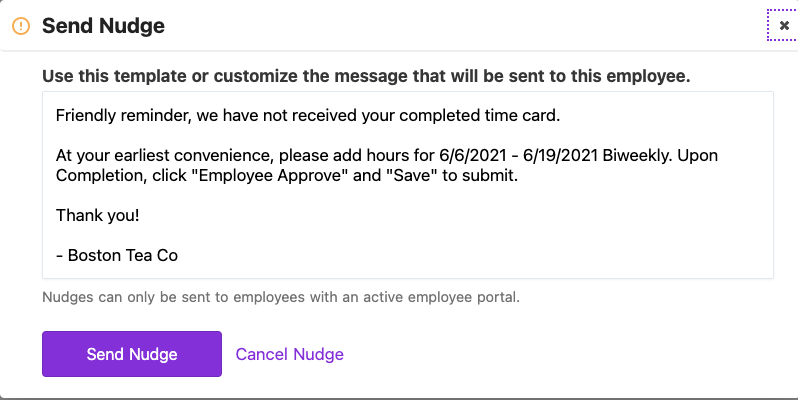
If an employee has not completed or approved their time cards, you can “nudge” them to complete their timecard on the employee timecard or the Manage Time Card Page.
💡 You can only nudge employees who have set up their employee portal.
- Go to Payroll > Time and Attendance Tasks > Manage Time Cards.
- Select the employee name if you want to view the individual timecards.
- Select the envelope icon to nudge the employee under the “Approval” section.
- A popup will appear with the default message.
- Click in the box to customize the message.
- Click “Send Nudge.”
- An email will be sent to the employee.

How to Reject Time Cards
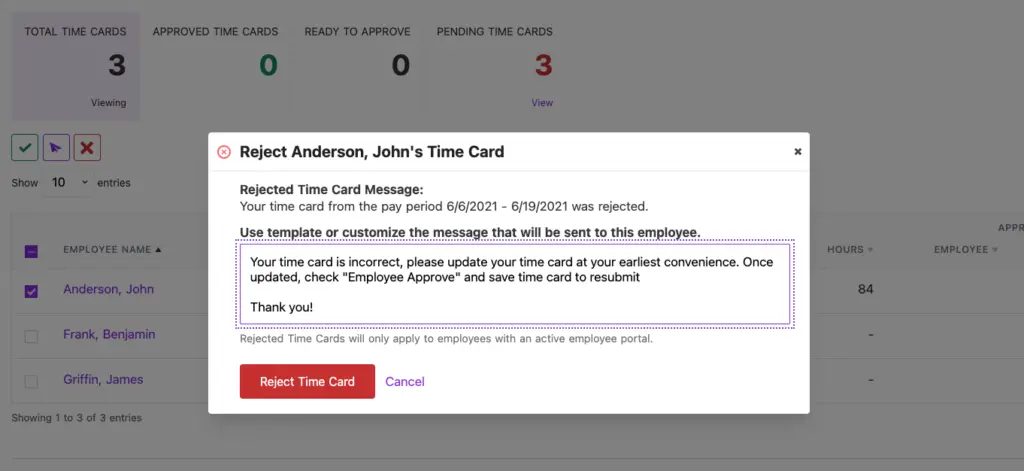
You can reject time cards for employees on the employee time card, or on the Manage Time Card Page.
💡 You can only reject time cards for employees who have set up their employee portal. Otherwise, edit the employee time card, and make a note of changes made for the employee’s record on the time card.
- Payroll > Time and Attendance Tasks > Manage Time Cards.
- Select the employee name if you want to view the individual timecard.
- Select the X to reject the time card under the “Approval” section.
- A pop-up will appear with the default rejection message.
- Click in the box to customize the message for your employee.
- Click the “Reject Time Card” button.
- An email will be sent to the employee.

Do your employees have questions? We have help for them too. See the help article for employees, “Salary Employees: Entering My Time Worked.”
Your feedback will not receive a reply. If you have a specific issue, please reach out to our support team here.