How to Print Paychecks Using Blank Check Stock
Background
If you use completely blank check stock with a MICR (Magnetic Ink Character Recognition) printer cartridge to print the bank account number at the bottom of the checks, you can print payroll checks in Patriot Software to print the entire check, including the account number.
This is helpful if you pay checks from different company bank accounts, or simply prefer to use blank check stock instead of pre-printed check stock.
Also see Setting Up Printed Paychecks if you use check stock pre-printed with the routing and account number.
How to Print Paychecks with a MICR Printer
When using blank check stock with a MICR printer, there are strict placement guidelines as to where the bank account numbers appear on the check, so that the checks can be easily processed by banks.
For more information about setting up check stock that is pre-printed with your bank account numbers, see, “Setting Up Printed Paychecks.”
How to Set Up Blank Check Stock
In order to use blank check stock in Patriot Software, you must use one check per 8 ½ x 11 page. The check can be either at the top third or bottom third of the page as long as the check portion of the check stock measures 8.5×3.5 inches.
- Go to Payroll > Settings > Payroll Settings > Paycheck Printing Options
- Select either “Check On Top” or “Check On Bottom,” depending on your check stock layout
- Check the box “I need to print my bank account information on blank check stock.”
- Enter your bank account info to be printed on the checks.
- “Show last check number used”
- Check this box to show the last check number used when printing paychecks. This helps you enter the correct starting check number for your next payroll.
- “I need to print my employee’s name and address on the check”
- Check this box if you want the address to print directly on the check and show through a window envelope for mailing.
Nudging the placement of items on the check
- First, click “Print Sample” (under the check layout options) to see how your checks will look, using a grid for placement.
- You can make changes and print samples as many times as needed in order to ensure your items print properly on your check.
- Click “Blank Check Stock Layout Adjustments.”
- The pay check item locations will be printed based on column and row numbers.
- Check the box beside each item you want to display.
- Change the column and row numbers for each item by clicking the up and down arrows.
- The default column and row numbers for each field is 0 (zero).
- Changing the numbers changes the position of each item on the check.
- To move the address one gridline to the right, add 10 to the column number.
- To move the address one gridline to the left, subtract 10 from the column number. You can enter negative numbers.
- To move the address one gridline above, add 10 to the row number.
- To move the address one gridline below, subtract 10 from the row number. You can enter negative numbers.
- Save your settings after you preview and are satisfied with the placement.
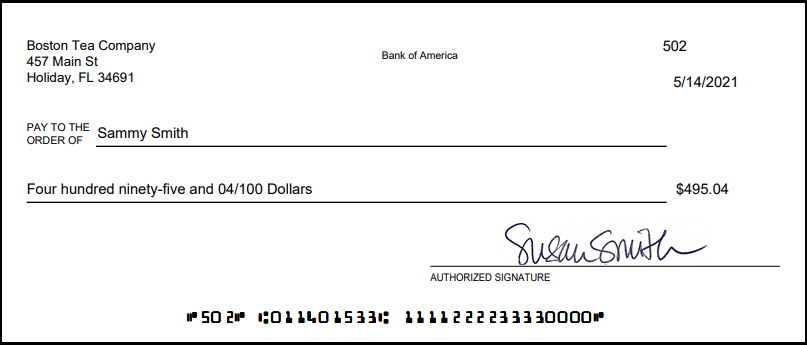
Example print placement
Your check will look similar to this:
How Do I Adjust Bank Account and Routing Numbers?
💡 You cannot move, aka “nudge,” or alter the bank and routing numbers because of stringent security regulations and the technical requirements for check processing. It ensures that these numbers are printed in the correct MICR font, and in the precise location adhering to all banking standards to ensure the checks are processable and secure.
To troubleshoot:
- Make sure you are using check stock with the check part of the check stock measuring 8.5×3.5 inches.
- This is the most common check stock.
- Make sure in your print settings you DO NOT have “fit to page” checked.
- Make sure your “Scale” is set to 100.
Your feedback will not receive a reply. If you have a specific issue, please reach out to our support team here.