Hourly Employees: Entering My Time Worked
If you are an employee and have any questions about your paychecks, W-2s, or using the employee portal, please contact your employer. Patriot Support staff cannot answer your questions via chat, email, or phone. We can only speak with authorized company contacts.
If your employer offers timekeeping, and you are an hourly employee, follow these steps to enter your time. Note: If a manager has already approved this time card, you will see the word “Approved” in the top right corner. If the time card has been approved, you can no longer make time card entries for that pay period.
1. Log in to your employee portal.
2. From the Home page, click “Time Cards” on the left. By default, the time card for the current pay period will appear.
Your Time Card Layout
- Your time card will display your work location’s time zone. To change your work time zone: Go to MY INFO > Personal Info > Work Time Zone. Click in the dropdown box to select a new timezone. Click Save.
- The current Year and Pay Period will appear in the dropdown lists at the top of the page. To view a time card for a different pay period, select it from the dropdown list and click Run Report.
- Each day is shown in columns, and hours types are shown in rows.
- If you are paid weekly, you will see a grid for one week.
- If you are paid biweekly, you will see a grid for two weeks.
- If you are paid semi-monthly or monthly, your time card will show all days included in the pay period. Any days of the week outside the pay period will be shown in gray.
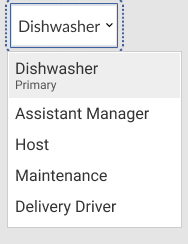
- Your job or role description will be displayed if your employer has set you up with multiple pay rates for different jobs or roles. If you have multiple job roles, your primary job will be displayed by default. If you have more than one pay rate select the job role description you want to enter the time for from the dropdown.
3. Enter your time
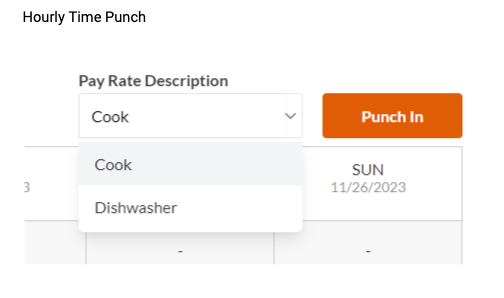
- If your employer has set your time card to punch in and out, you will see “Punch In” and “Punch Out” buttons. Click the “Punch In” button to automatically enter an “IN” timestamp on your time card. Click the “Punch Out” button to enter an “OUT” timestamp on your time card. If you miss a punch or need to make corrections to your timecard, you will need to ask your employer to fix this for you.
- If you do not punch your time, enter the times of day you started and stopped work in the “In” and “Out” cells. When you click inside each cell, a pop-up time entry window will display (see example above). Click on the hour and minute, or just click “Now” for the current time. You can also manually type your hours and minutes in the following format: 9:00 AM.
- Click Add In/Out to add another set of “In” and “Out” cells for a day. For example, if you arrive at 8 a.m. and leave for a lunch break from 12 -1 p.m., add another set of in/out cells. Then, you can record your arrival time, when you left for lunch, when you returned, and when you left for the day.
Be sure to include a corresponding “Out” time for each “In” time added.
If you have more than one pay rate description be mindful of the pay rate description and be sure to clock both “In” and “Out” before you begin your next job activity with the new pay rate description. - To track paid breaks, enter the paid break start time in the “In” cell and enter the paid break stop time in the “Out” cell.
4. Add “Other Hours,” if applicable. If your employer offers tracking for non-worked hours such as vacations or holidays, click “Other Hours.” New rows will appear on your time card (if your employer has added them). Enter the total daily non-worked hours in the corresponding row.
5. Add any comments, if needed. There is space at the bottom of the time card to add your comments about this pay period, such as explaining an absence or a changed work schedule.
6. Check the “Employee Approved” box in the lower right corner when you are finished entering your time for the pay period. You can still make edits after you approve your own time card, but you can no longer make edits once your manager approves the time card and you see the word “Approved” in the top right corner.
7. Click Exit Time Card, and click “Yes,” to save your entries.
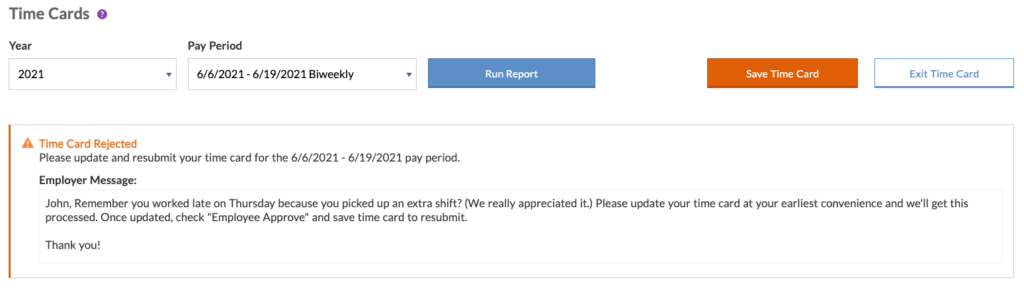
Time card rejection
If your employer rejects your timecard, you will be notified by email and also in your employee portal.
- Make the necessary corrections
- Click “Employee Approve”
- Click “Save”
Your feedback will not receive a reply. If you have a specific issue, please reach out to our support team here.